Table of Contents
Multi-Ship: Multiple Shipping Addresses on a One-Page Checkout
What is Multi-Ship?
FoxyCart's “Multi-Ship” functionality allows for a single order to contain multiple “sub-orders” of sorts, each of which can be shipped to a separate address. While this option really doesn't make much sense for a “normal” store, it can be a fantastic option for merchants selling things like gifts, cookies or desserts, or other items that typically are purchased by one person but shipped to multiple locations.
While it is a little more advanced than the standard single-ship checkout process, it's really not that bad, and can be a very profitable feature if the product and target market are right.

How Multi-Ship Works
Multi-Ship is enabled by checking the box labeled multiple ship-to addresses in the settings page of your store's admin and click the Update Store button to save the setting. Here's a link to that page: FoxyCart Store Settings
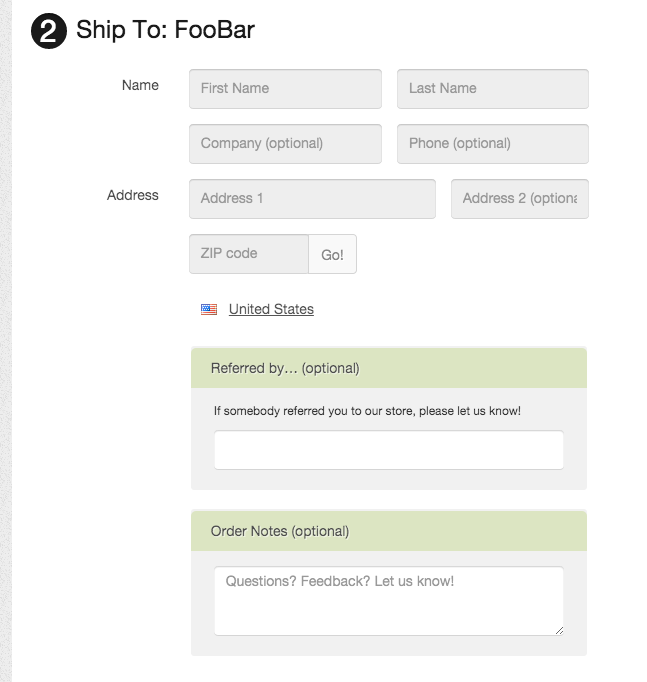
To implement Multi-Ship in your store, you'll start by adding a ''shipto'' parameter to any products added to the cart. To see it in action, add to cart at least 2 products with different values of the shipto parameter. For example - if the following product was added to the cart twice, once with with the shipto select element set to “Me” and another time with it set to “Mom”, it would look like the screenshot above:
<form action="https://YOURDOMAIN.foxycart.com/cart?" method="post">
    <input type="hidden" name="code" value="CCCOOKIES" />
    <input type="hidden" name="name" value="Chocolate Chip Cookies" />
    <input type="hidden" name="price" value="10.00" />
    <label>Ship To:</label>
    <select name="shipto">
        <option value="Me">Me</option>
        <option value="Mom">Mom</option>
        <option value="Friend">Friend</option>
    </select>
    <input type="submit" value="Add Chocolate Chip Cookies to cart" />
</form>
For applying Multi-Ship to your store you probably wouldn’t want to hard-code the different shipto values as in the example above, but instead let the customer enter their own custom values and have the dropdown remember those. We recommend a quick bit of javascript (results of which is displayed below) to keep shipto values consistent and easy to manage for your customers.

With Multi-Ship enabled for your store, you'll notice that your cart now displays products grouped by “ship to” headings, and the checkout (displayed below) also has different functionality in the shipping address section.

Each shipto address can accept custom fields per ''shipto'' (as displayed above), and each shipto section will receive its own shipping options as configured for your store. It also will display a per-shipto subtotal, and all of this will be reflected in the email receipts as well.
Worth noting is that, like all product options, a shipto value cannot be changed on a product once it is in the cart. Products can be removed and re-added, but not modified, so you'll want to make it easy for your customers to view their cart in order to remove products as necessary.
Custom Address Fields for MultiShip
Just like normal custom checkout fields, you can add additional custom fields per shipping address on the checkout. Just add the extra code in the appropriate section of the template configuration options in the admin, and the rest happens fairly automagically. It'll look something like this:
Here's some sample code for adding a referral source for each shipto address:
<div class="fc-form-group ">
    <div class="col-md-8 col-md-offset-3" data-fc-error-for="referral_source" data-fc-error-class="fc-alert-container--error">
        <div class="fc-input-group-container fc-input-group-container--checkbox fc-input-group-container--active">
            <label class="fc-input-group-container__title fc-input-group-container__title--forced fc-form-label">
                Referred by… (required)
            </label>
            <div class="fc-form-group">
                <p>Please let us know who referred you.</p>
                <input
                    type="text"
                    id="referral_source"
                    name="referral_source"
                    placeholder=""
                    autocomplete="off"
                    class="fc-form-control"
                    formnovalidate=""
                    autofocus=""
                    aria-required="true"
                    value="{{ referral_source }}"
                    data-fc-required
                >
            </div>
        </div>
    </div>
</div>